Cron
A HIIT timer app.
usage
installation
- Get the APK from github
- Get it from obtainium
workflow

When you open the app you will see a tab view with a form and at the bottom of the screen a Start button.
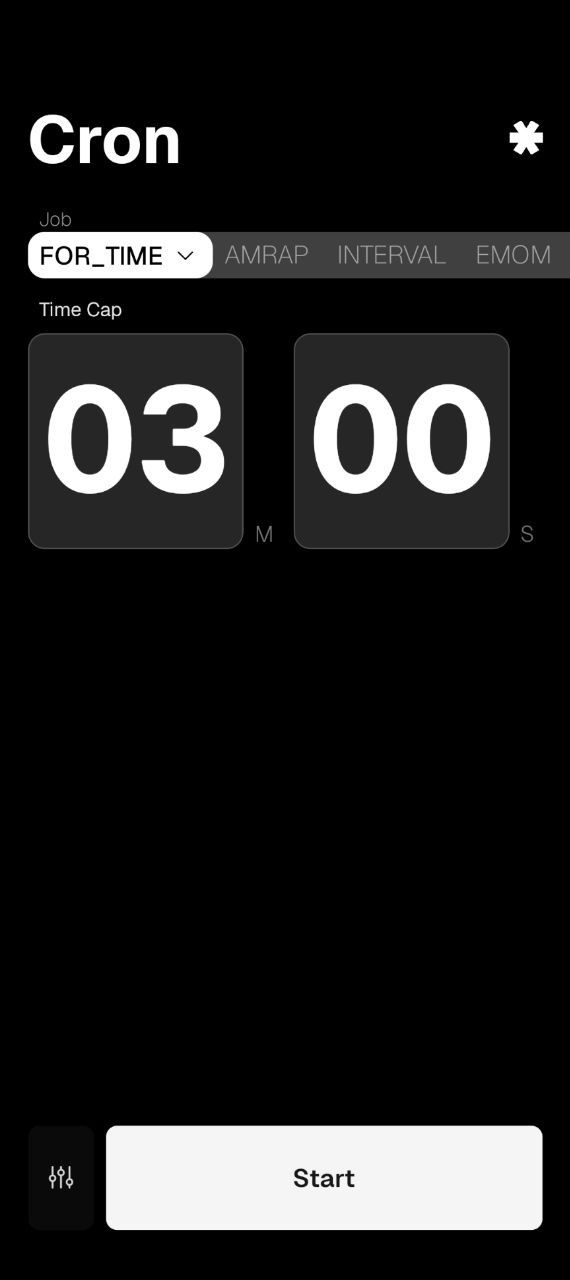
So, the main question the app asks you is "Which type of timer do you need?" and you answer that with the tab you currently are in.
From there, you can just set the parameters of your routine and press the Start button.
NOTE: You can just slide left or right to navigate between tabs (timer types).
available timer types
- For Time (Up Timer)
- AMRAP (Down Timer)
- Interval
- EMOM (Rounds)
- Stopwatch
interactions
On the timer screen there are only 2 interactions:
- long press: pauses the timer and lets you finish (or resume) the timer.
- double tap: (only in AMRAP & Stopwatch timers) registers a new checkpoint.
settings
You can access the settings screen by pressing the setting button on the left side of the main start button.
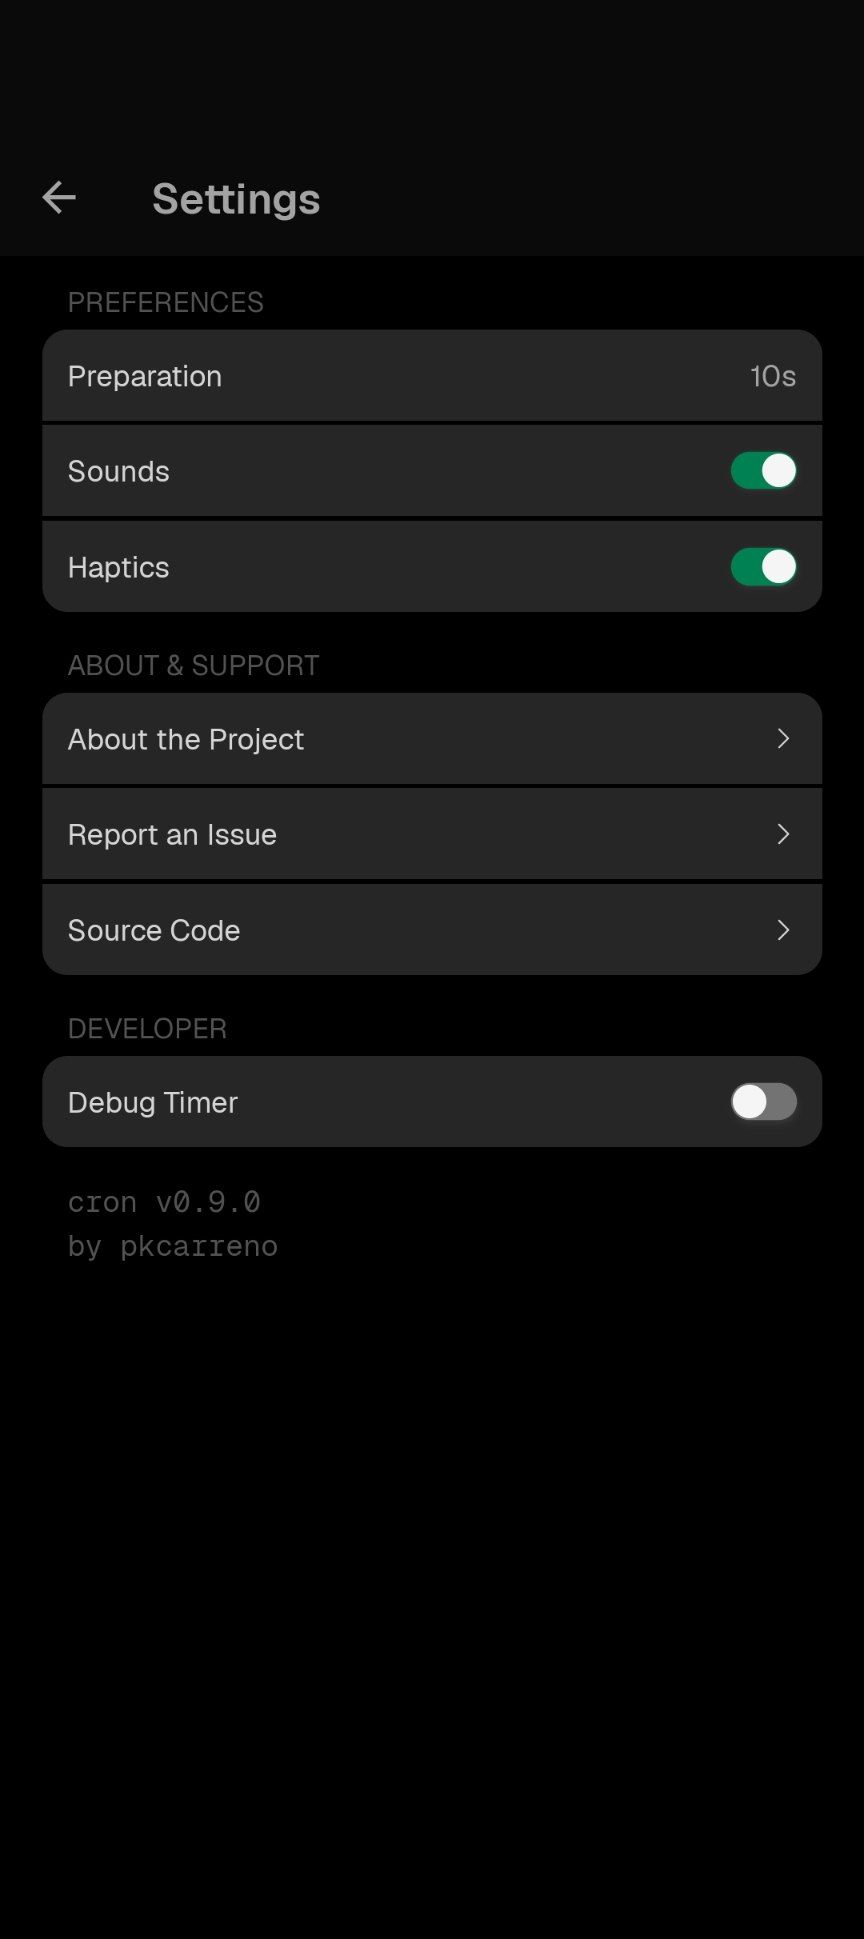
On the settings screen you can customize the app's behavior, such as the timer sound, the haptic feedback, preparation time, as well as the app's info.
motivation
I've been waiting for a while for an excuse to make my own mobile app. Something that will be useful and not only a showcase of skills. That's the same philosophy I apply to all my projects.
In this case, I was exhausted by barely legible timer apps. I think they miss the point of a HIIT timer app.
Don't get me wrong, they do the job and work as expected, but the idea of a HIIT timer app is that you can see the time with ease even when you are exhausted and far away, like the wall timer ones.
I tried to bring the same experience of a wall timer to my phone: big numbers, simple & quick interface, and taking up as much screen real estate as possible.
internals
This app is built with Expo. I didn't spend time thinking about other options, like native or flutter. Expo is what I'm already familiar with and what I want to continue developing my skills with.
I tried to use as few dependencies as possible. I use mainly the Expo ecosystem, which helps me to keep the codebase easy to maintain and update, but I also use some others for better performance or because of the lack of Expo alternatives.
I started with a clean Expo 54 template, and at some point, I upgraded to Expo 55 which is the latest version at the time of writing.
Once I had the clean Expo project, I proceeded to set up my developer experience tools. I added lefthook and commitlint, also I replaced eslint and prettier in order to use ultracite with oxlint and oxfmt.
This was the first time I used something different from eslint for a React Native project, I knew there's been some work on making these alternatives compatible with React Native and I wanted to test how mature the ecosystem was. I still faced some wrong error reports while linting that I had to silence, but overall, and thanks to oxlint-plugin-react-native, I had a good developing experience.
Most of my time went into the app's business logic, the visuals and the CI/CD pipeline.
timer logic
A decoupled architecture was a priority for the timer logic. I tried multiple ways of abstraction for the timer logic. I faced a few challenges that made me rewrite the timer logic from scratch.
These challenges arose from my initial lack of knowledge about HIIT timers. While experimenting with different approaches I happened to shift my thinking on it.
At first, I thought it was just a timer, then I realized it was more complex than expected because of all the different timer types and the many names they have. At some point, I realized that there are many timers, yes, but you can reduce all of them down to five main logic abstractions and everything else are presets. The main abstractions are:
- A count-down timer.
- A count-up timer.
- A rounds timer with custom round duration.
- An interval timer which has phases and where completing each phase counts as a round, also with custom phase durations.
- A stopwatch.
Once I had a clear understanding of the timer and how it should behave, I started planning an architecture for the timer logic.
The first thing I had to resolve was how to start and keep a loop for the counting process until the goal time is reached.
I decided to use a tick-based approach, which uses the requestAnimationFrame API to trigger a callback at each animation frame if the thread is available. This same approach helps to catch up on missed frames, like when the app is in background or the device is under heavy load, which helps to keep the timer accurate.
On the other hand, I used an abstract strategy to define how the timer should behave based on the selected timer type. I defined a strategy per timer type, each having its own rules for calculating the current state.
interface TimerState {
  displayTimeMs: number;
  currentRound: number;
  totalRounds: number;
  phase: TimerPhase;
  isFinished: boolean;
}
The return payload contains all the necessary data to format the timer display, with displayTimeMs being the actual value to render as time, in a way that I can easily handle the count up, count down, restarting from zero on rounds or phases. This payload allows me to have an agnostic timer face which knows nothing about the timer logic at all; it just renders values.
The only thing left was how to orchestrate the ticks and the behavior strategy. Since both are based on a common interface, I built a controller which initiates the tick engine and integrates it to the passed strategy.
This is the core idea of how the timer logic works. You can expand on this logic in the source code.
visuals
I had a clear idea of what the app would look like, and I spent some time working on the designs. Before writing a single line of code, thinking about the timer logic and giving it a visual form really helped me to make faster and better decisions.
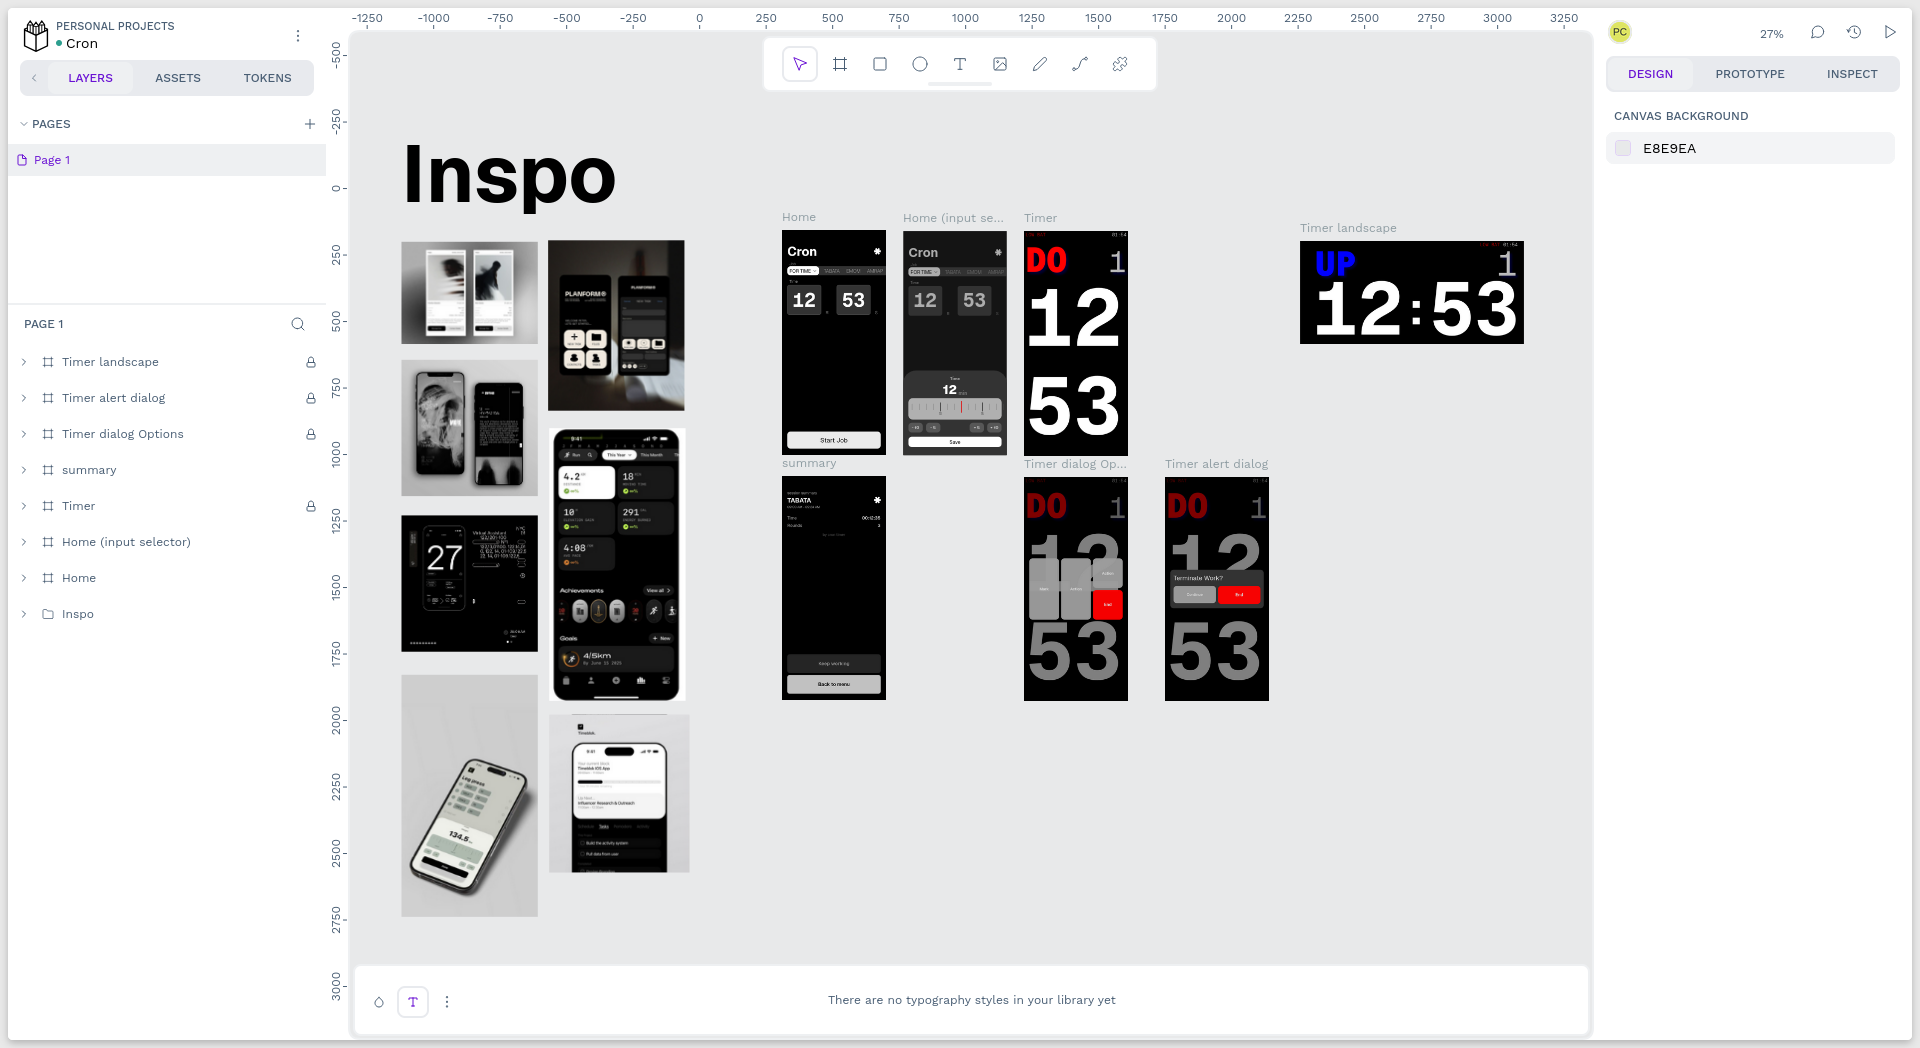
Some rules I had in mind:
- Big numbers, numbers should be as big as the screen allows.
- High contrast, easy to read even on exhausted athletes.
- Haptics and sound feedback to give athletes clear directions on what's happening.
- Big buttons and simple gestures, should be easy to interact with even when your precision is compromised after an intense workout.
About the landscape mode...
I initially considered landscape mode a must, because in my mind this would have the biggest text-to-screen ratio, but thanks to the aspect ratio of nowadays mobile screens the biggest text-to-screen ratio happened in portrait mode, so I decided to go with portrait mode only.
the bridge between logic and ui
With a fully agnostic timer architecture, the challenge was integrating it smoothly into the React lifecycle.
I solved this by wrapping the TimerController inside a custom hook. This hook acts as the bridge: it takes the selected strategy and event callbacks, listens to the controller's ticks, and safely exposes the timer state and control methods to the UI. This keeps the React components completely dumb, they just receive formatted data ready to be rendered, while the hook handles the synchronization under the hood.
deployment
The most complicated part of the development was the CI/CD setup. I always use EAS. As far as I know there is no better alternative that is worth the effort of setting up a custom CI/CD pipeline for most of the apps. But since I wanted a standard open-source app, that workflow doesn't work for me at all.
My idea was to be open-source and sideload-first, and distributing via App Stores as a secondary option. So I spent a lot of time looking into how to achieve this.
It helped me a lot to check how Bluesky handled this. They basically used EAS to handle all their credentials but built locally in the GitHub Actions workflow. I mixed that with how the react-native-template-obytes triggers manual releases and that's what worked for me.
availability
Currently the app is only available on Android through sideloading. I'm planning to release it on the Play Store in the future.
About iOS, technically it works because I don't have any Android specific logic. Maybe I will have to tweak the haptics behavior to fit it as my plan but should pretty much work out of the box. But, I don't have an iPhone and don't want to pay USD 99 annually from my pocket just to publish this app. So, if I find enough support for it then at some point I will work on it.